
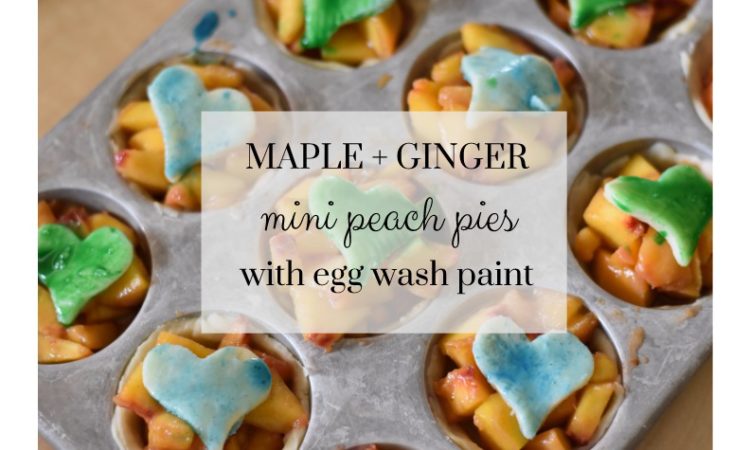
Is anyone else out there holding onto summer? Or is summer holding onto me?? As I’m typing it’s 80 degrees outside and a glorious sun kissed day! That’s September for ya… the best month in my opinion.

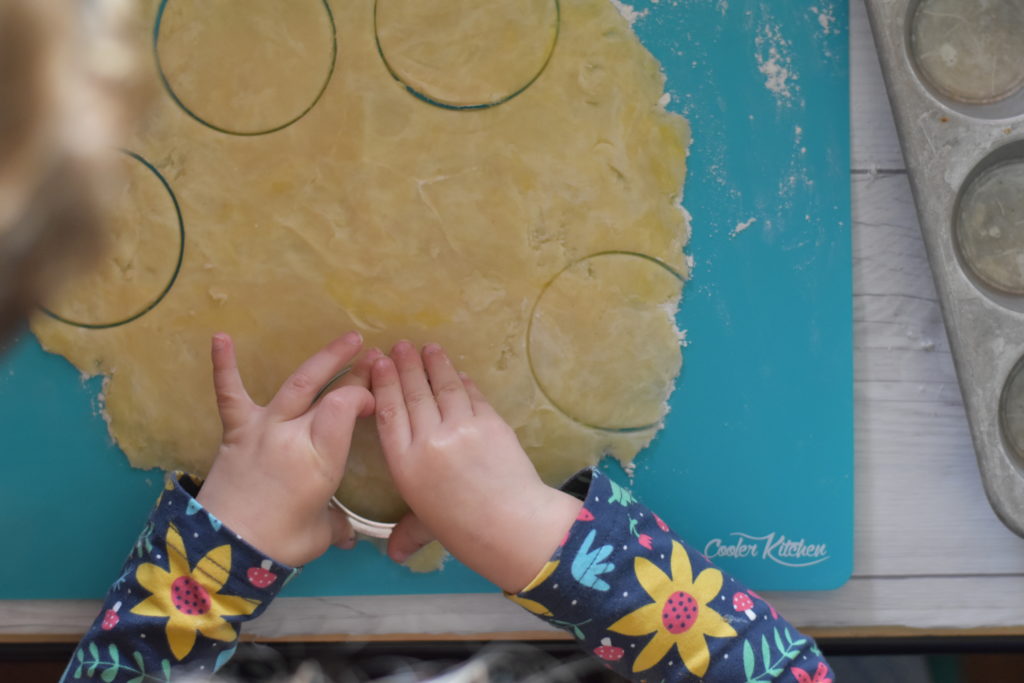
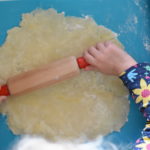
This recipe has a lot of fun exciting cooking projects for you and the kiddos. The first part to these mini peach pies is the crust. I’m featuring my FAVORITE pie crust today which comes from the Pioneer Woman (as many of my favorites do!). Here you can see little miss two helping prepare the crust for these little beauties.


Reasons I love this crust – you can make it ahead and freeze it, and its super flaky! But you don’t just freeze it – first separate the big batch into 2 or 3 balls based on what you are using it for and how thick you like your crust. For this mini peach pie project you need 2/3 of the full batch so I’d recommend splitting the dough into 3 equal balls. Stick it into a freezer bag and flatten it out into a disc – so it’s all ready to roll!


Enter my favorite most beautiful part of this recipe – the peaches! Oh so juicy and ripe!
Let’s talk about “blanching” peaches. Who here has heard of this revolutionary concept?? I was just taught this during August when my mom wanted to freeze a huge box full of local peaches. She “blanched” them first by boiling them for about a minute, then dumped them into an ice bath – after they cool down you can pull the skin right off without using a knife or a peeler. It’s amazing! And peeling a blanched cooled peach by hand is a great task for toddlers!
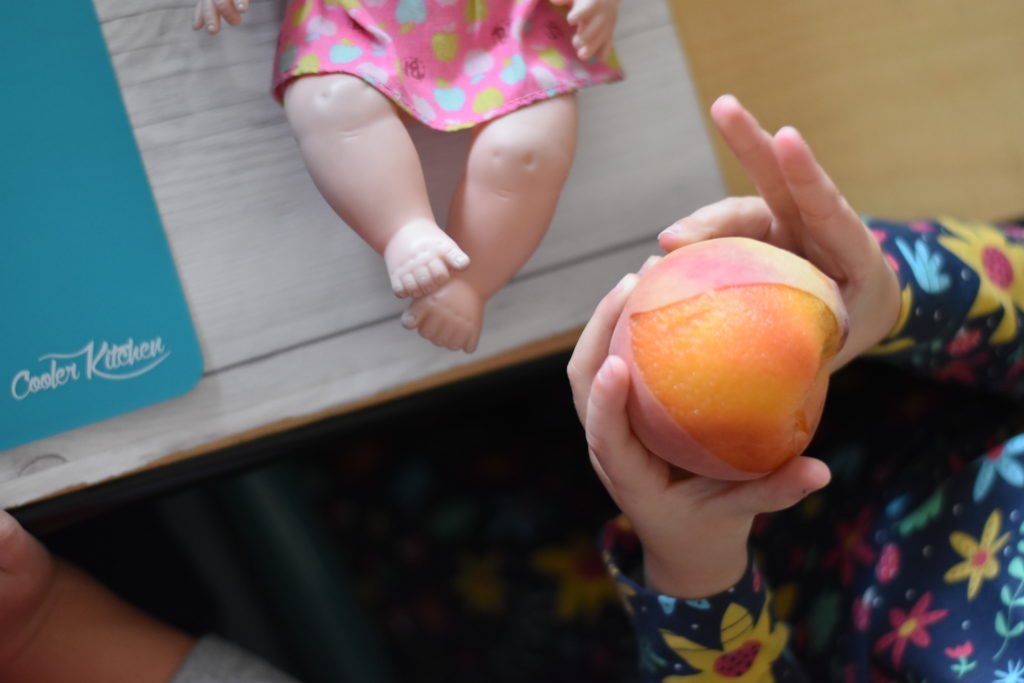
Baby doll came to help cook today 🙂 my kids were a little squimish about peeling these blanched peaches because of the squishy texture.
BLANCHING PEACHES
- Bring a pot of water to boil.
- Drop in your peaches so all are covered with water.
- Allow them to boil for 1 minute (less if they are overripe, more time if they are hard/firm).
- Remove with a slotted spoon and put directly into an ice bath to cool.
- Once they are cooled enough to touch, proceed to peeling off the skin and making your pies!
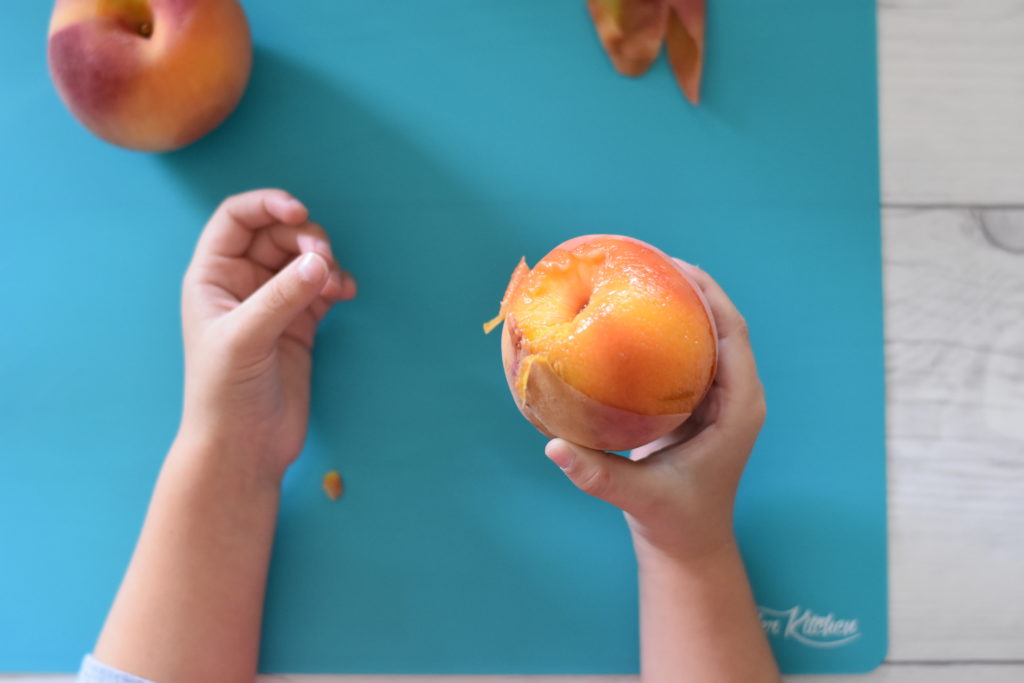
You want to make sure you don’t leave them in long enough to start cooking the peach – just long enough that the skin starts to pull back. Here’s a nice little article with more details on blanching, and a guide to how long to boil them based on how ripe your peaches are. Another great toddler task is next… chopping! And what a great learning moment talking about the “pit” in the middle.


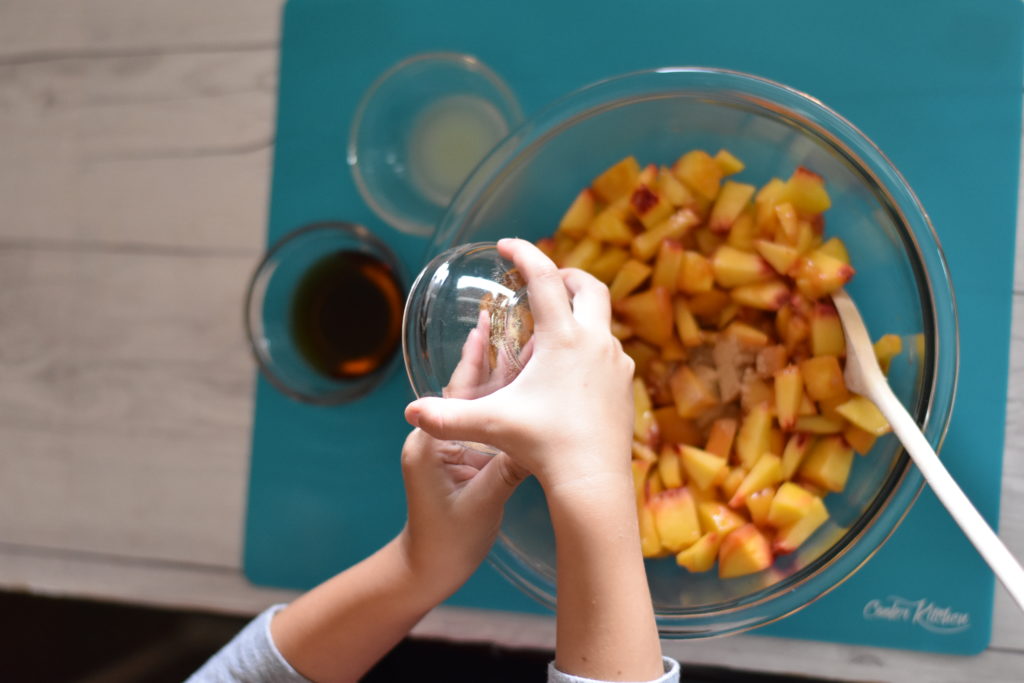
After your peaches are chopped, toss them with the lemon juice, flour, maple syrup and ginger.
Get your pie crust out of the freezer and let it sit for about 15 minutes, then we’re ready to roll!!


You need a round cookie cutter that is 3.5 inches across – these regular mason jar lids were actually a little small so we had to add pie crust to each tin to finish lining them.
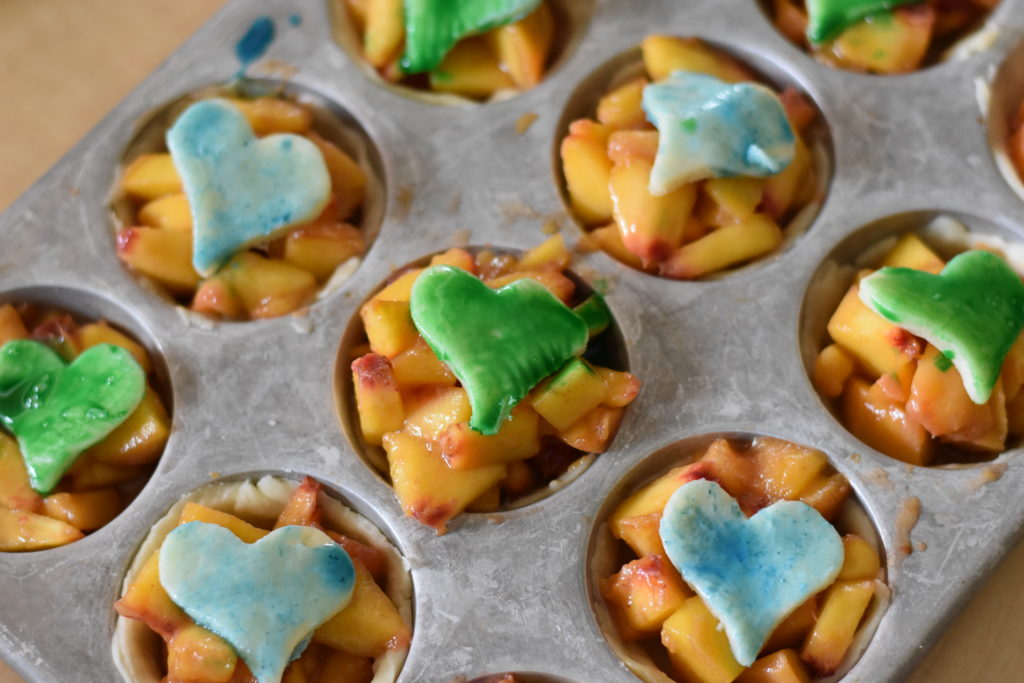
Fill the lined muffin tin with sliced peaches…


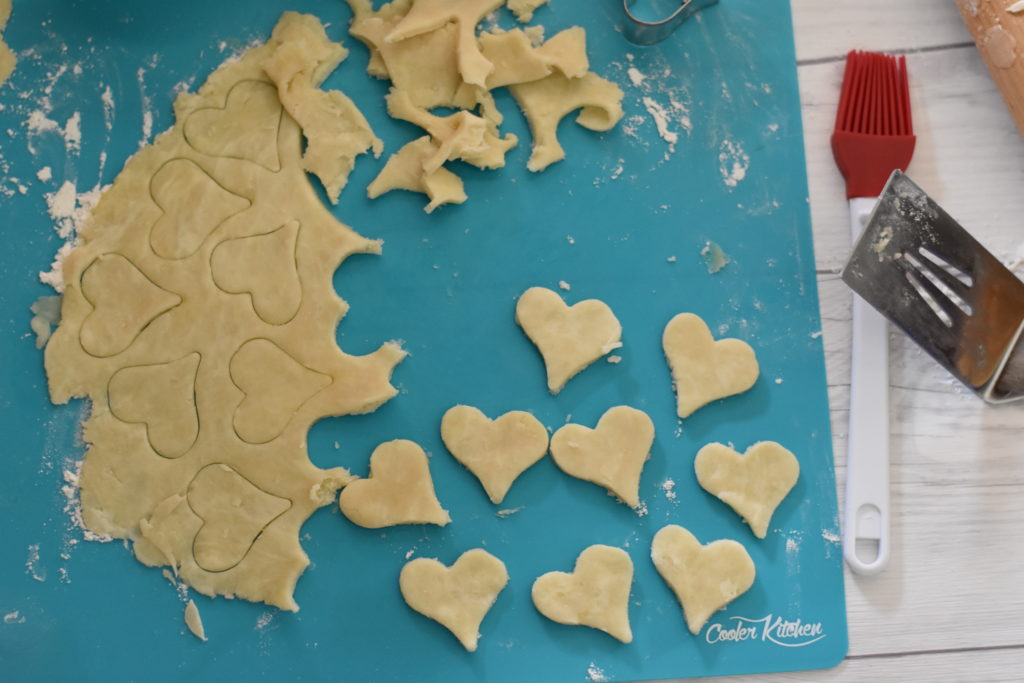
Roll some more pie crust out for the decorative topping, cut out some heart shapes…
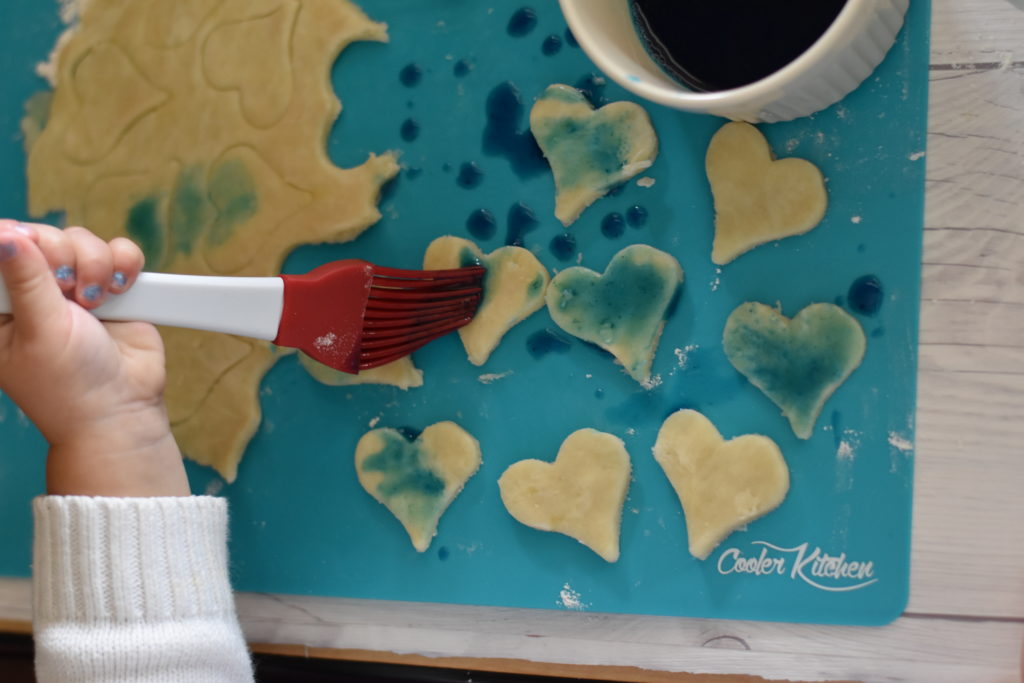
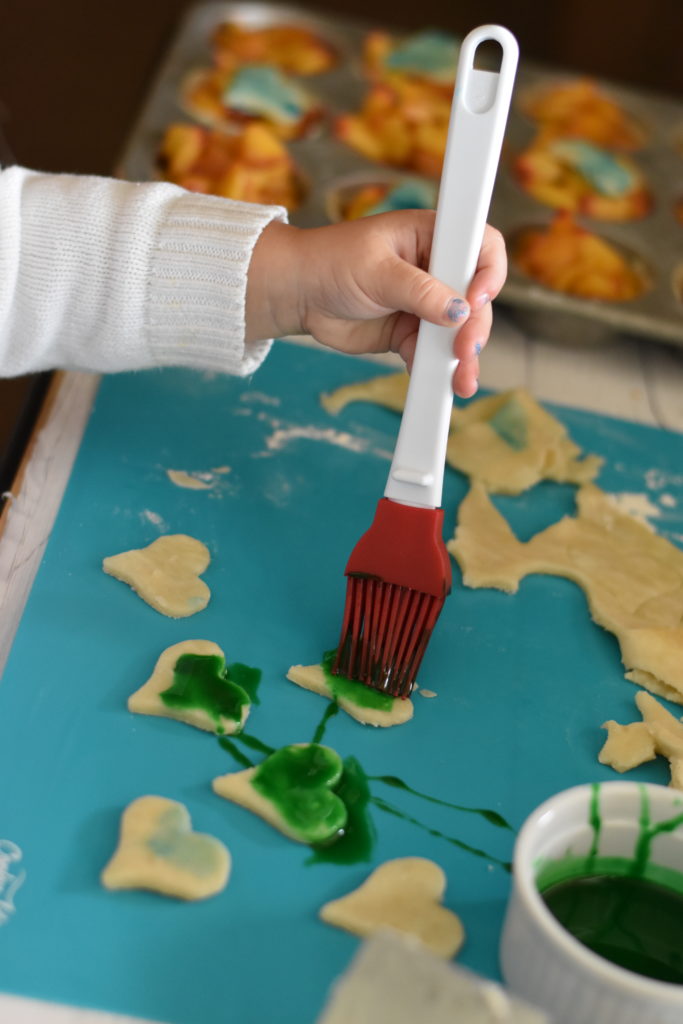
 And now we paint! The reason I wanted to try this experiment was because of my daughter’s love of painting. She really loves to paint! I thought it would be a fun toddler task to incorporate into a recipe.
EGG WASH PAINT OPTION 1
The first is with an egg white, 1 Tbsp of water, and 10 drops of food coloring. This is the blue paint and it ended up pretty translucent with a lighter color.
EGG WASH PAINT OPTION 2
The second option we tried was egg yolk, whisked with 10 drops of green food coloring. I loved the bold color that it made! And the finish that had a nice sheen.
Add these onto your little pies…
And voila! You are ready to bake.
KEEPIN’ IT REAL
Shout out to you Ree AKA the Pioneer Woman for this concept. At the end of every cookbook she inserts a page called “Keepin’ It Real” where she puts pictures of her kitchen, piled with dirty dishes and an absolute DISASTER… It’s my favorite page in the whole cookbook because it’s realistic and humorous and makes her appear human and comforts me when my life is a mess. Here is my keepin’ it real moment:
This recipe was not easy. There are a ton of steps, and it was a lot of work. My kids fought over who was going to roll the pie dough, who got to use the little rolling pin, when we were cutting out the pie crust for the tins… and ladling the peaches in. They were both SO EXCITED to do that. That’s one of my real struggles doing these recipes with the kids, taking turns and being patient can be so hard! Sometimes I lose my patience with them in these moments, get upset and have to stop and take a break. I forgot to check how big to cut out the circles for the muffin tins and used the wrong size cookie cutter, so then we had to just smash pie crust around the edges to fill them up to the top instead of them fitting neatly. I made a HUGE MESS making these pies. There was flour everywhere, pie crust dough everywhere, egg wash paint everywhere. We don’t have a dishwasher, and I had more dishes at the end than fit into the sink. I took over 200 pictures, most of which were not in focus – and selected only 24 of the very BEST to use in this post. Just keepin’ it real!

PW's Perfect Pie Crust
Ingredients
- 1 1/2 cups shortening
- 3 cups flour
- 5 Tbsp cold water
- 1 Tbsp white vinegar
- 1 egg
- 1 tsp salt
Instructions
-
Cut Crisco into the flour until it resembles coarse meal.
-
In a small bowl beat the egg with the water, vinegar and salt. Pour over Crisco/flour mixture and stir together gently.
-
Separate the dough into thirds. Place each ball into a ziploc and flatten into a 1/2 inch disc (to make rolling easier later). Seal and freeze until needed.
-
When you're ready to make your pies, pull however much you need (2 sections for the mini peach pies) out to thaw at room temperature for 15 minutes. Flour your surface and roll the crust into a thin circle. Now you can use it for whatever purpose!

Mini Peach Pies
Ingredients
- 2/3 recipe PW perfect pie crust
FILLING
- 4 ripe peaches, blanched
- 1 Tbsp lemon juice
- 1 Tbsp flour
- 2 Tbsp maple syrup
- 1/2 tsp ground ginger
PIE CRUST EGG WASH PAINT - option 1
- 1 egg white
- 1 Tbsp water
- 10 drops desired food coloring
PIE CRUST EGG WASH PAINT - option 2
- 1 egg yolk
- 10 drops desired food coloring
Serve With
- whipping cream or vanilla ice cream, if desired
Instructions
-
Preheat oven to 350F.
-
Roll out one pie crust section. Use a 3.5 inch round cookie cutter to make 12 circles. Press into your muffin tins.
-
Peel blanched peaches and chop into 1 inch little chunks. Stir chopped peaches with lemon juice, flour, maple syrup and ground ginger.
-
Ladle peaches into the 12 crust lined muffin tins.
-
Using the leftover crust from the first pie crust, and another addition section of frozen crust, roll out your pie crust and cut out 12 small hearts with a cookie cutter.
-
Make your egg wash paint by putting the desired egg wash ingredients into a small bowl and whisking together. The egg white option produces a more translucent finish, while the egg yolk option creates a brighter and stronger finish.
-
Paint your hearts with the egg wash, then place the hearts over the peach pies.
-
Bake at 350F for 20-30 minutes or until peaches are bubbly. Leave them to cool in the muffin tin, then remove carefully. Serve with whipping cream or vanilla ice cream if desired.