
I’m so excited to be sharing this two part tutorial from my friend Bre! I absolutely love her cookies that I’ve seen her posting on Instagram. With this tutorial and inspiration you can create your own beautiful cookies for your toddlers birthday or other celebration! Read on and enjoy 🙂 -Bethany
Hi everybody! I’m Bre from baked.by.bre, cookie enthusiast and self-taught decorator. For more cookie art, follow me on Instagram @baked.by.bre and on Facebook at baked.by.bre.
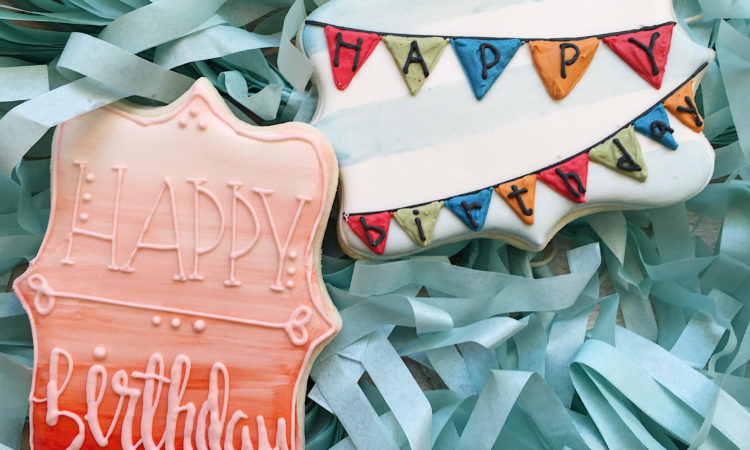
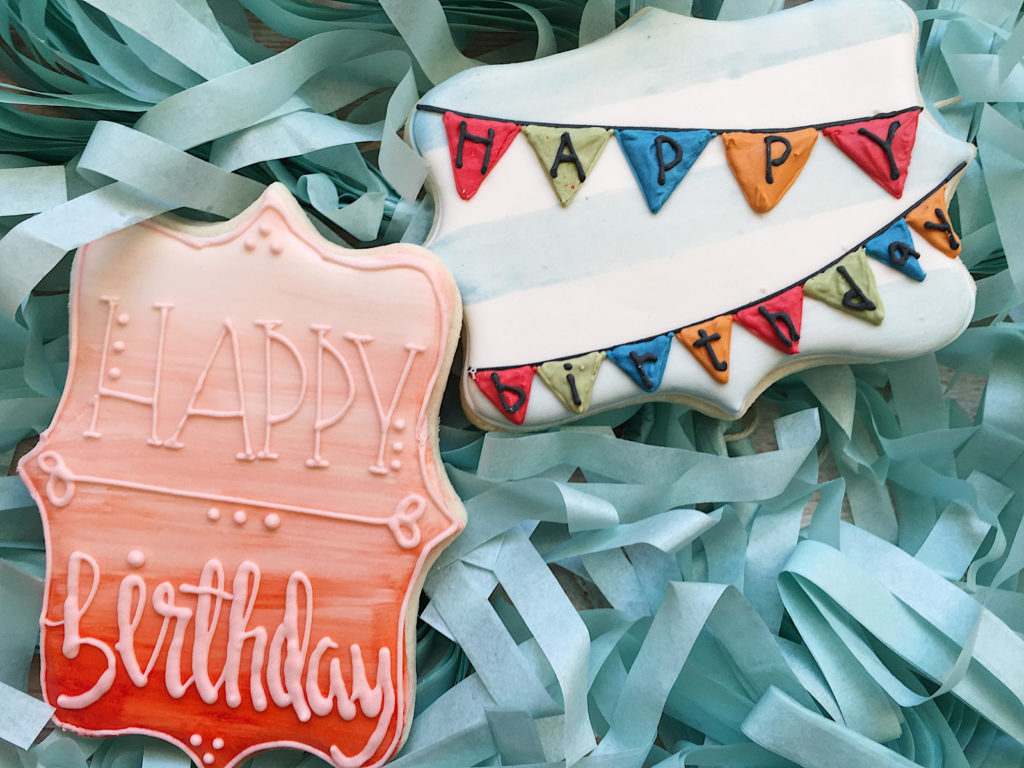
Today I’m going to show you how to make delicious and adorable cookies that will take your child’s birthday to the next level!
This flawless icing look is achieved by using royal icing. I will add a recipe at the end, so feel free to scroll down (or click here ) if you want to skip ahead to that part!
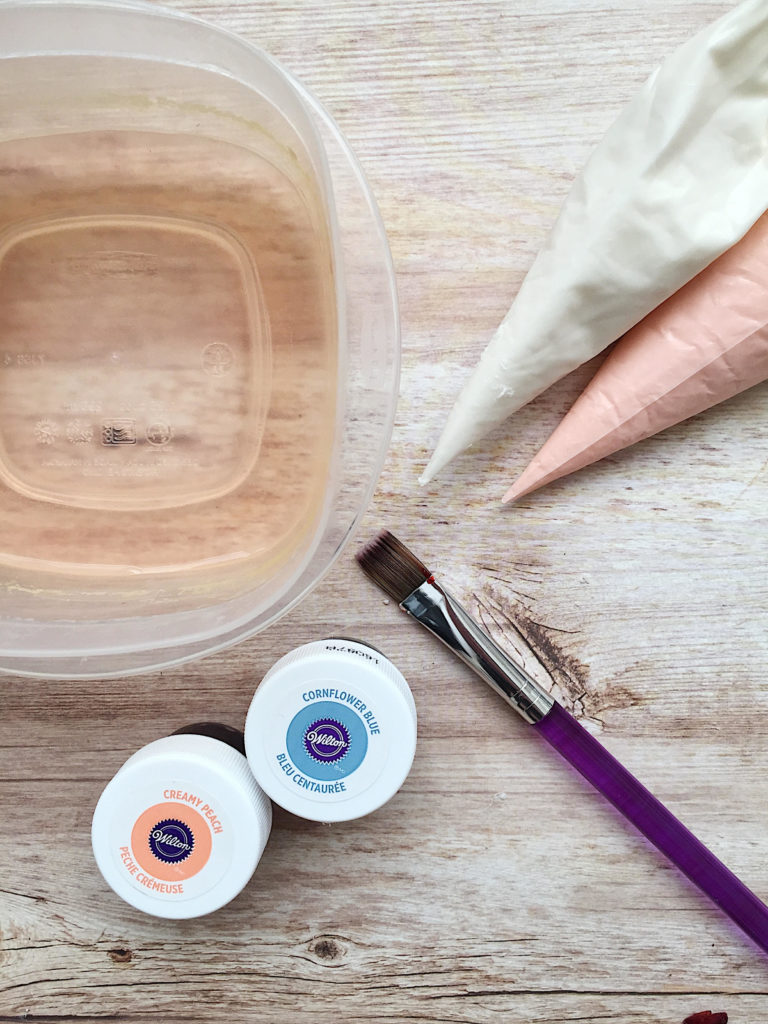
For this tutorial you will need 2 different consistencies of royal icing. One that is flood consistency (if you pull your spatula through it, it takes about 3 seconds to smooth out again), and one that is stiff consistency (about 10 seconds to go smooth again). You will also need, a food-safe paint brush (mine is from wilton), and gel food coloring (I used wilton’s cornflower blue, and creamy peach). Last but not least, an incredible amount of patience!
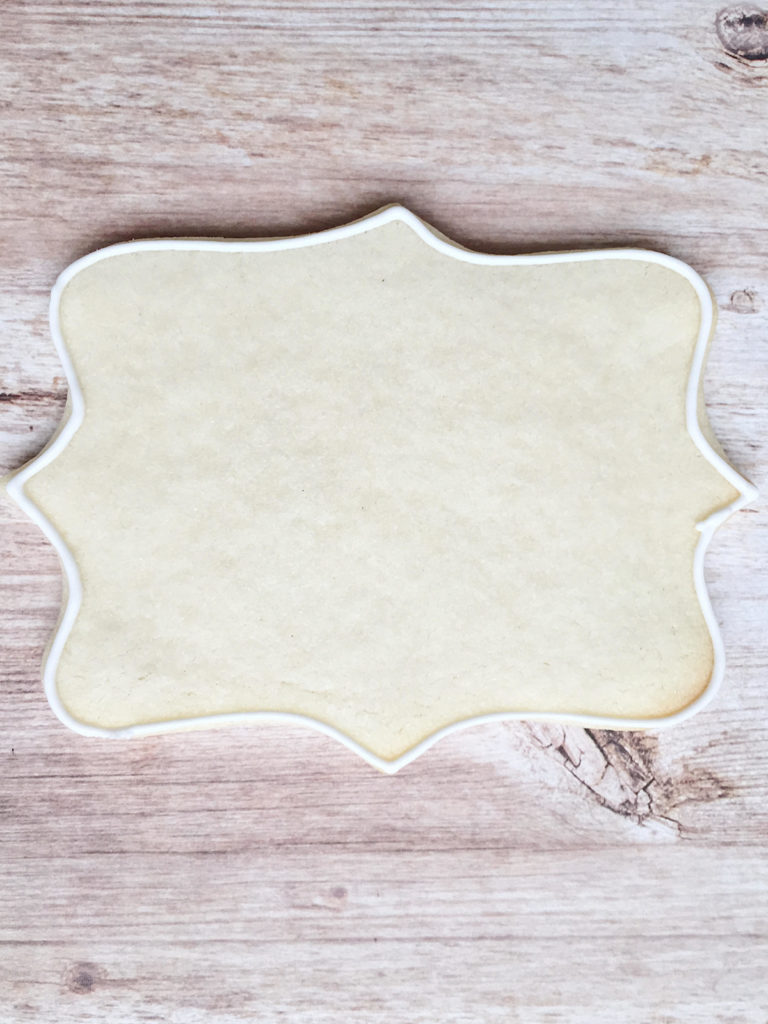
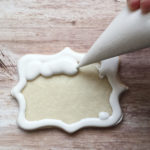
To get started, I used white flood consistency icing to pipe around the outside of the cookie. NOTE: these plaque cookie cutters are so versatile and adorable. They are from Celebrate It. Click here or scroll to the end to find my go-to sugar cookie recipe!
*tip: when you are outlining, lift the tip of your bag about an inch above the cookie and let the icing fall onto the cookie, only putting the tip down to attach the icing at the beginning and the end. This will help you achieve straighter lines.
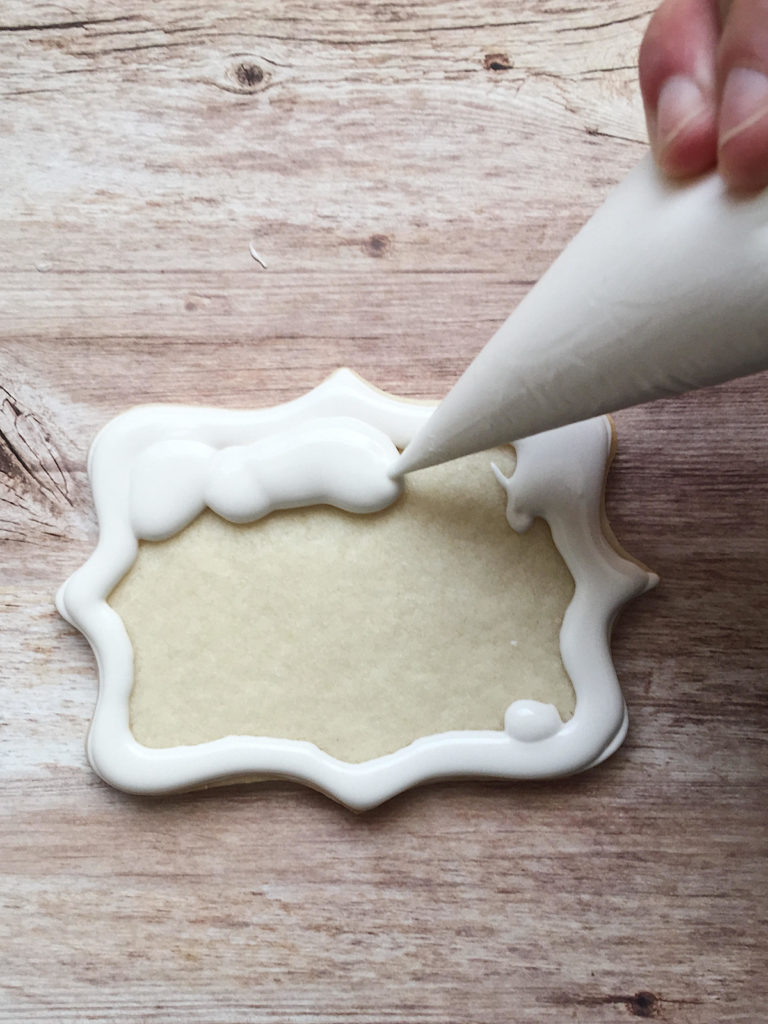
After your cookie is outlined, I then flooded the cookie with my white icing. Do this by holding the tip down closer to the cookie, and squeezing hard until the icing pillows out around the tip. Slowly move around, until you have covered the whole cookie.
Allow your icing to dry for about 8 hours. I dry mine overnight.
After your icing is dry, its time get into the fun stuff! I have separated the rest of the steps for the girl cookie, and the boy cookie.
GIRL COOKIE TUTORIAL
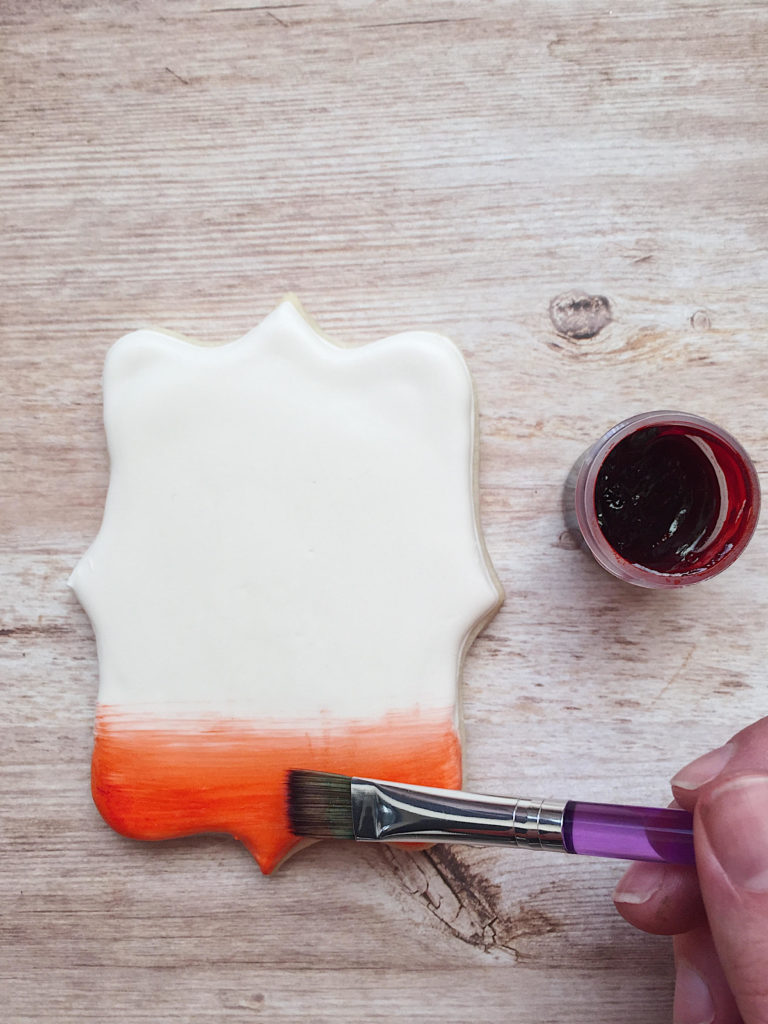
Take your gel food coloring (I used Wilton’s Creamy Peach), a little bit of water, and your brush. I start with just the tiniest amount of water and more food coloring and start painting at the base of the cookie.
*Tip: dab off any excess water before painting on the cookie, if you use too much water, it will cause your icing to crack.
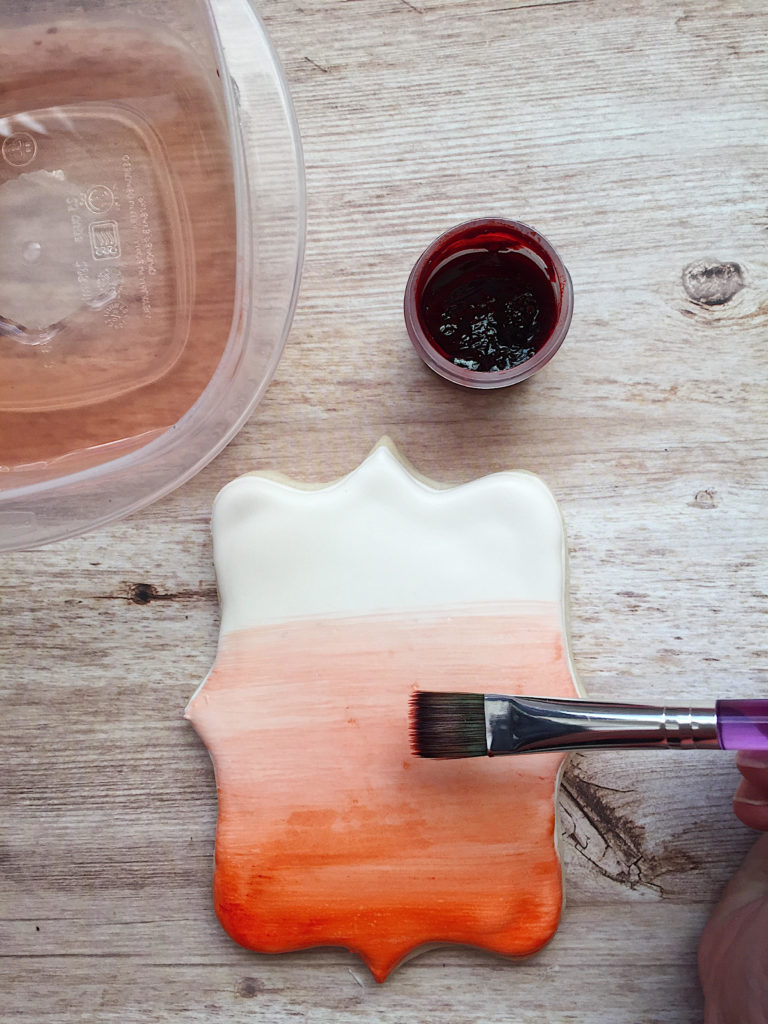
Slowly add a little more water to your brush and a smaller amount of food coloring and work your way up your cookie to create an ombre effect.
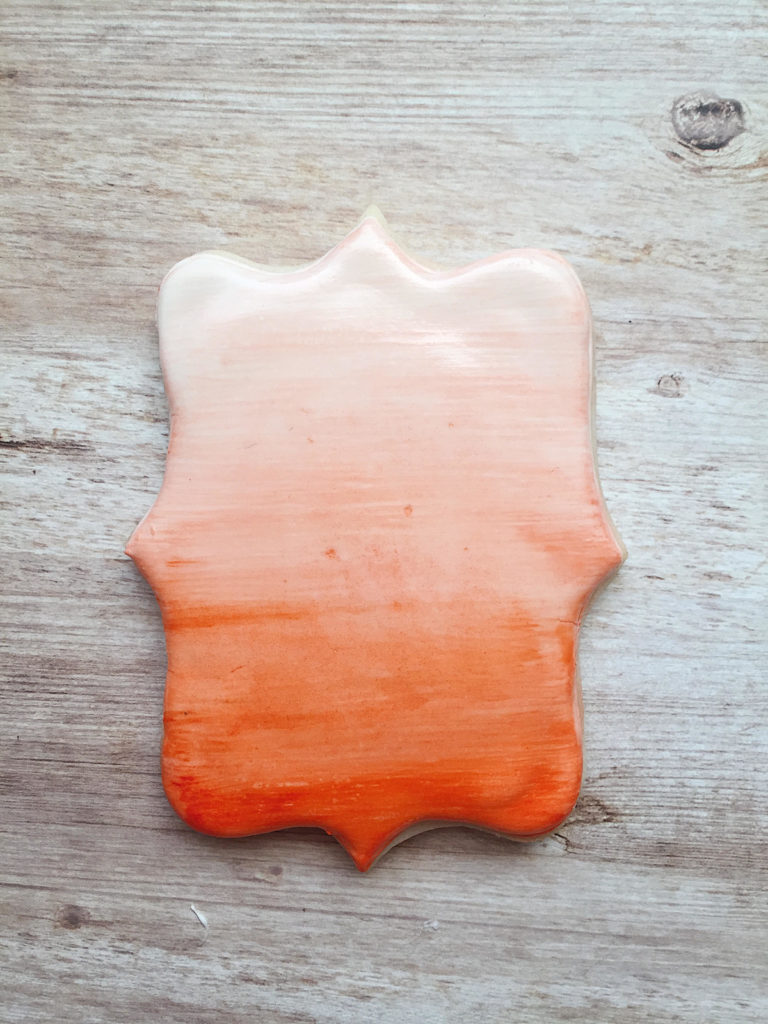
Once your cookie is all painted, let it dry for about 20 minutes.
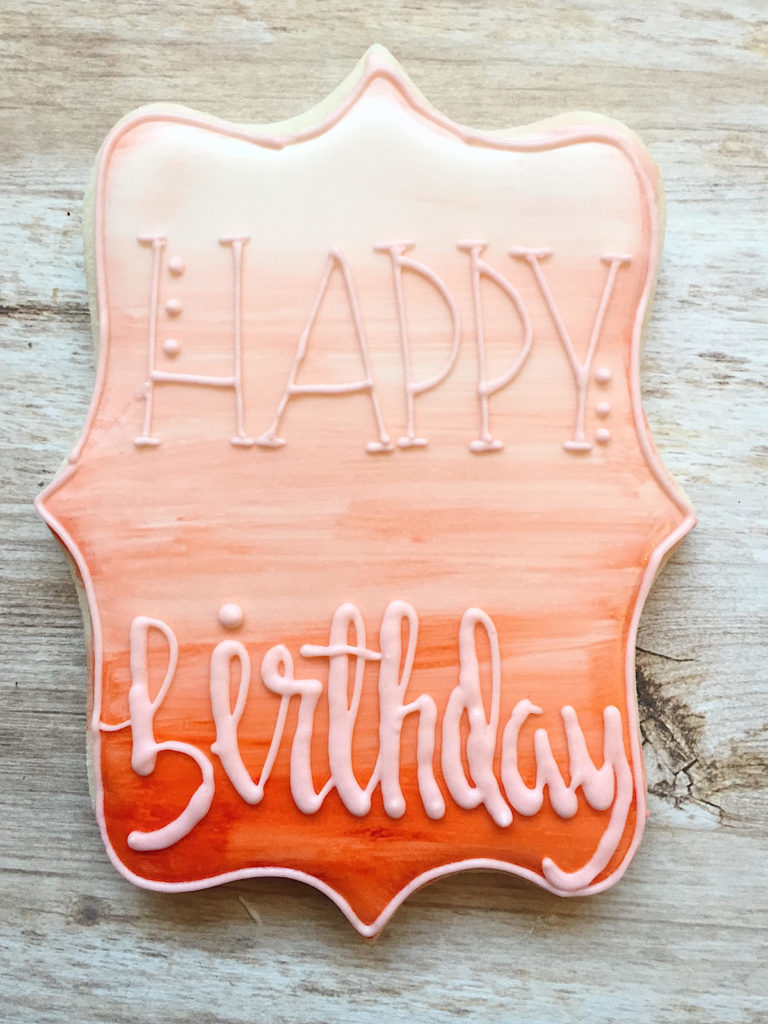
Using a stiff consistency icing, colored whatever color you want (I used Creamy Peach again) very carefully pipe the happy birthday. If you need to, practice piping it on paper towel or parchment paper first. PRACTICE! PRACTICE! PRACTICE!
*Tip: use the same technique as you did with the outlining to get straight lines. Attach the icing to the cookie then slowly lift it up and attach it again at the end of your line to get straight lines.
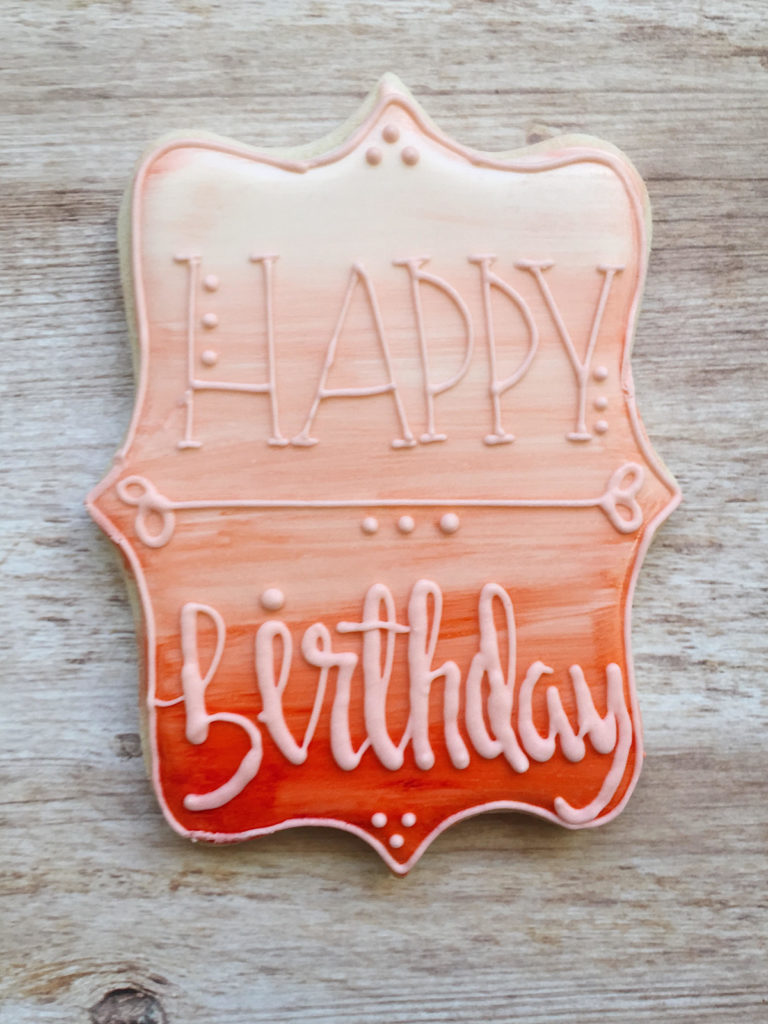
I added a few little details and also outlined my cookie again. This helps give it a finished look. Allow your letters and final details about 2 hours to dry.
BOY COOKIE TUTORIAL
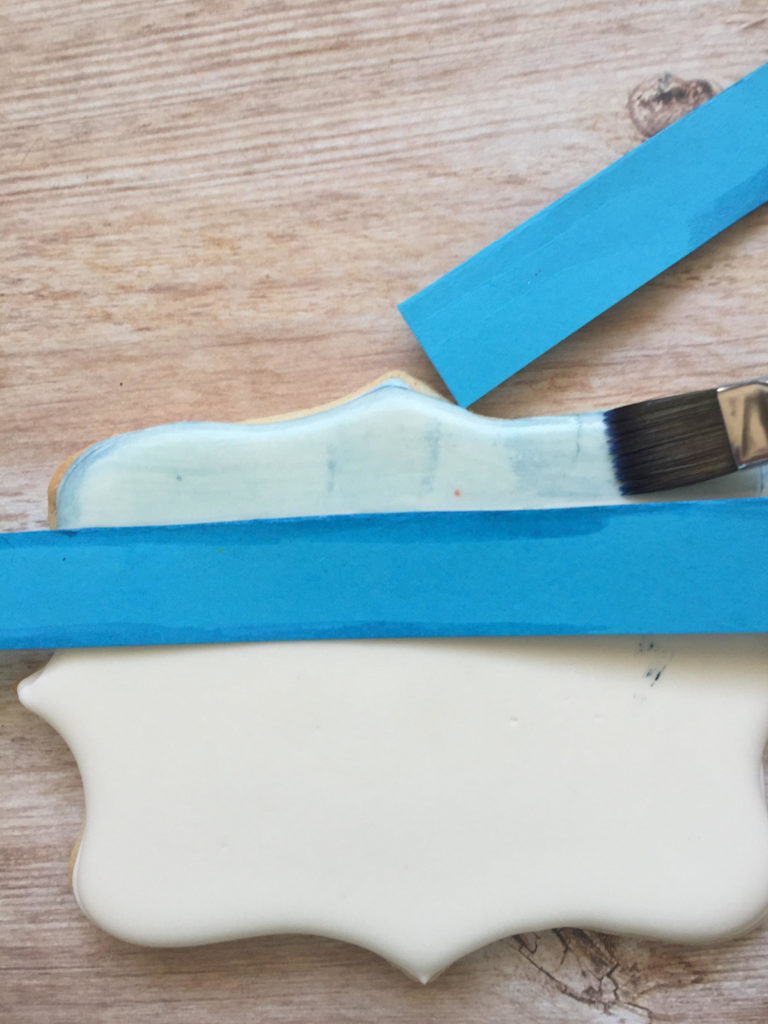
Take your dry white iced cookie, your brush, and some gel food coloring mixed with a few drops of water. I used these fancy pieces of paper I cut out as a sort of stencil. You can buy stencils for this purpose, but I’m all about getting creative with what I already have.
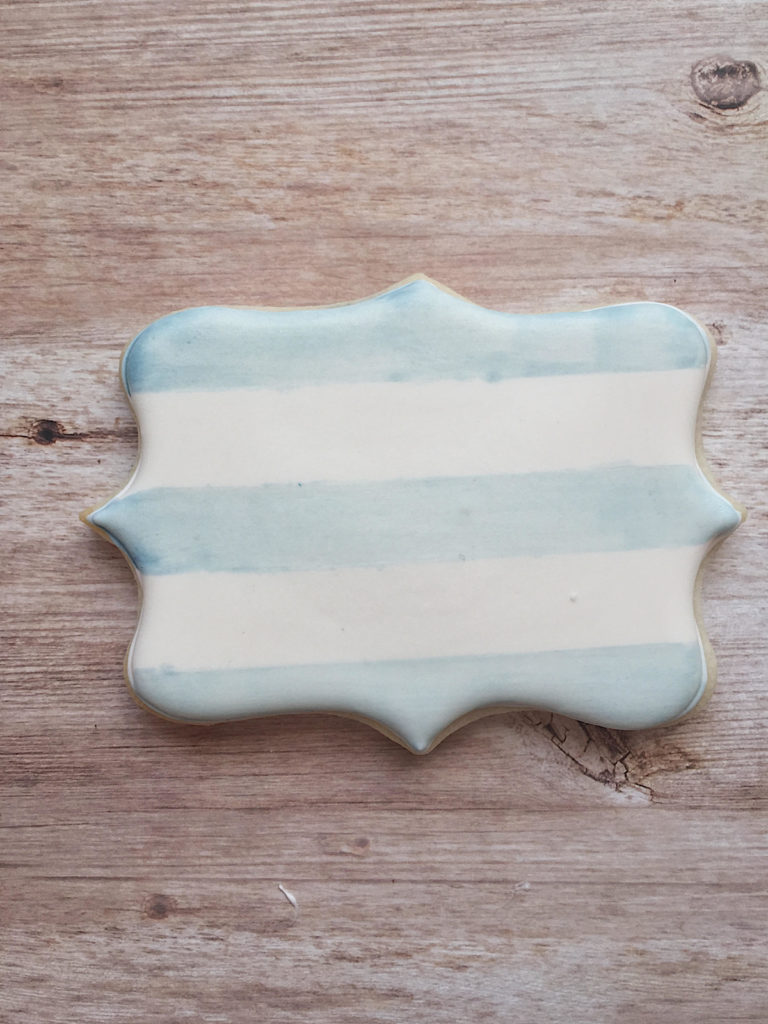
I painted stripes on my cookie, making sure to dab of excess water so as to not crack your icing, and then let it dry for about 20 minutes.
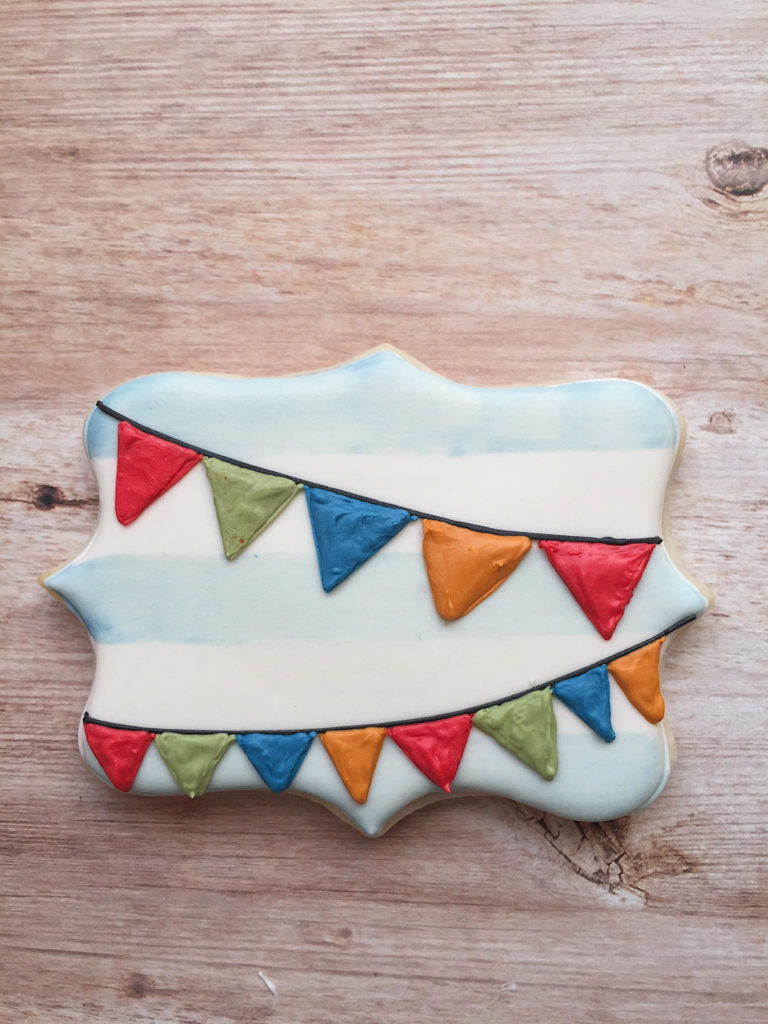
Using stiff consistency icing I made two black lines for my banner. I then added my triangle shapes to create the banner. Let that dry for about 2 hours.

Pipe the letters onto the banner using stiff black icing. For these smaller letters, I keep my bag a little closer to the surface, and don’t lift it as much as when we were outlining. Let it dry for a couple more hours and you’re done!

Royal Icing Recipe
Ingredients
- 1/3 cup meringue powder
- 3/4 cup water
- 2 lb powdered sugar
- 1 Tbsp vanilla extract
- 1 Tbsp corn syrup
Instructions
-
Add meringue powder and water to bowl. Mix on med-high for 1-2 minutes until frothy.
-
Add powdered sugar and vanilla extract. Mix on med-high until you reach a tooth paste consistency.
-
Add corn syrup and mix. Slowly add water one tsp at a time until you reach desired consistency.
Recipe Notes
Recipe courtesy of Breanne Anderson @baked.by.bre
Bre's Sugar Cookie Recipe
Ingredients
- 1 cup real butter
- 1 cup sugar
- 1 egg
- 1 1/2 tsp almond extract
- 3 cups flour
- 3/4 tsp baking powder
- 1/2 tsp salt
Instructions
-
Cream butter and sugar. Add in egg and extract.
-
In a separate bowl combine flour, baking powder and salt. Whisk.
-
Slowly add the flour mixture to the butter mixture. Mix until combined.
-
Roll the dough between two sheets of parchment paper. Chill in the fridge for 30 minutes.
-
Cut cookies into desired shapes and bake at 350F for 8-12 minutes.
Recipe Notes
Recipe courtesy of @baked.by.bre
~Breanne Anderson~
Follow along to see her amazing cookie art on IG and FB! Or get in touch to order cookies 🙂 Thanks Bre for sharing your expertise with us!!
Instagram: @baked.by.bre
Facebook: @baked.by.bre